This post may contain affiliate links. For more information, read my disclosure policy.
This week I’m headed to sunny Southern California and the wonderment, joy, and soul-sucking place called Disneyland. We’ve never been in summer and I’m so super excited about going in June (cue sarcasm). But really, we’ve been looking forward to this trip for a very long time and I’m going to try reallllly hard to unplug as much as possible all week. And thanks to a great line-up of bloggers, I’m going to get to do just that!
First up is one of my very best real-life and internet-blog friends, Ashton from Something Swanky. (Actually, think I can stop saying internet friend in any way related to her – we really are real-life friends.) I can’t even express how much Ashton means to me, and I’m so excited for her to hijack my blog for the day!
Take it away Ashton!
Hi there! Ashton, here. I blog over at Something Swanky Desserts & Designs.
I am so excited to be guest posting here at Crazy for Crust! Dorothy and I go way back. Well, at least “way back” in blogging years. We both started our dessert blogs around the same time and became fast friends. We even started a virtual blog conference together last year, called Online BlogCon.
Dorothy and I had such a fun opportunity to meet in person last Christmas, and she is seriously just as amazing in person as she is on her blog. Sometimes I daydream about life as Dorothy’s next door neighbor (but not in a creepy, stalker way)… I’d be over EVERY day for her peanut butter banana bread. It’s kind of insane, and addicting, and I won’t make banana bread any other way now. Seriously. My husband could vouch.
Anyway. Part of the reason I’m so excited to be guest posting over here is because I’m excited to return a favor!
A couple of years ago, Dorothy guest posted on my blog. She posted a recipe for Mini Fruit Tarts and it has been a staple in my own personal dessert repertoire ever since! It’s always my go-to recipe for bridal and baby showers, because they are so perfect for entertaining. They’re beautiful and and decadent but are super easy to whip up at the same time. Everyone who pops one of these bite-sized treats raves about how delicious they are, and I can’t disagree!
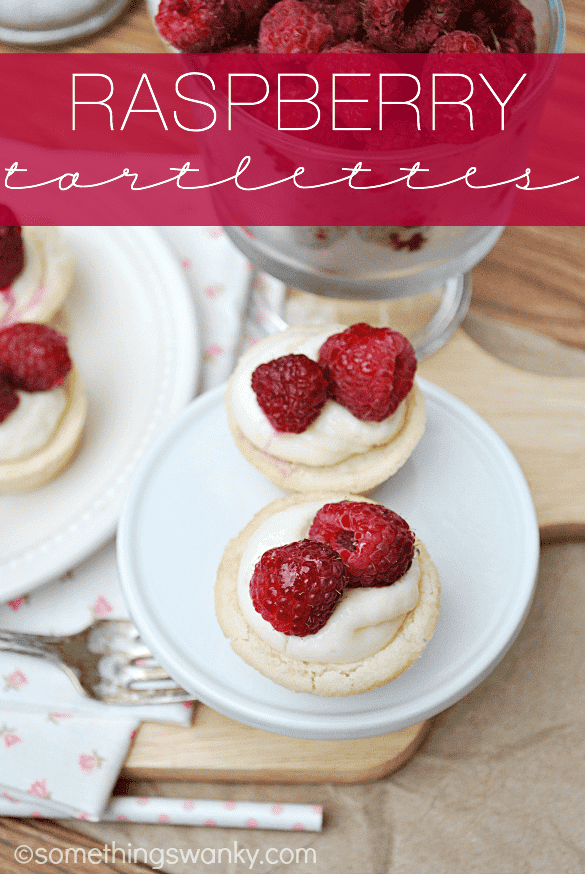
I’m such a sucker for a cream cheese filling, and when it’s paired with a buttery cookie crust and topped with fresh raspberries– I don’t stand a chance!
Since it’s been a couple of years since Dorothy posted this on my blog, I thought it’d be nice to give it a tune up and send it right back to her with a new look. Raspberries are my favorite fruit for this dessert, but if you go back to the original recipe, you’ll see that Dorothy topped hers with strawberries and blueberries too! You could add any type of seasonable fruit to these tartlettes for an extremely impressive dessert!

Raspberry Tartlets
Ingredients
For the Crust:
- 1/2 cup powdered sugar
- 1 1/2 cups all-purpose flour
- 3/4 cup + 2-3 tbsp. unsalted butter cold and cut into cubes
For the Filling:
- 1 8-ounce package cream cheese, softened
- 1/2 cup granulated sugar
- 1 teaspoon vanilla
Topping:
- Fresh raspberries
- 1/4 cup corn syrup
- 1 tbsp lime juice
Instructions
- Preheat oven to 350 degrees F. Grease a mini muffin tin well with nonstick cooking spray.
- Combine the powdered sugar, flour, and 3/4 cup butter in a food processor. If necessary, add 2-3 tbsp more of butter 1 tbsp at a time until a firm dough forms (you don't want it to be crumbly, but it shouldn't be sticky either).
- Scoop dough by the tablespoon and press into the mini muffin tin.
- Bake for 10 minutes. Press the back of a tablespoon into each crust IMMEDIATELY upon removing from the oven. This creates the indentation for the filling. Let cool completely.
- Meanwhile, beat together the cream cheese, granulated (yes! granulated.) sugar, and the vanilla until smooth. Spoon the cream cheese filling into a ziptop bag.
- Once the crusts have cooled and been removed from the pan (I do this by gently pressing down on the edges and twisting, and they come out pretty easily; but you could also tap the bottom of the pan to release more than one at a time), snip the corner of the filling bag and pipe about a tablespoon of filling into each crust.
- In a small bowl, whisk together the lime juice and the corn syrup. Top each tartlette with a couple of raspberries, and brush the lime glaze over top. If possible, chill before serving.
- The crusts can be filled and chilled ahead of time, but do not top with fruit or glaze until just before serving. Otherwise the juices will "bleed" into the filling. Store covered in the refrigerator.
Recipe Nutrition
Ashton blogs all about dessert recipes ranging from fanciful creations to classic comfort food treats at www.somethingswanky.com. She is a work-at-home mom of one, wife, domestic, and currently obsessed with West Wing and all forms of Baked Brie. She lives in fear of her inbox.
Stay connected and follow Ashton here:
Facebook | Twitter | Pinterest | BlogLovin | Instagram
Thanks Ashton! Today we’re spending the day on I-5 and at the American Girl Store. Happy Father’s Day to my husband! 😉 Anyone want to bet how many times Jordan has said “are we there yet”? My guess is 4,321. Have a great Sunday!
Thanks for reading!

These tarts look fabulous, I’m a sucker for bite size desserts! You can eat twice as many, right?! Have a great trip!
Yes!! Twice as many for sure. 🙂
these look so good!! I’m in love with raspberries! Enjoy your trip!!
Thanks Dana!
These look like my perfect idea of dessert! Thanks for sharing, Ashton and Dorothy!
Thanks Sarah!
AAAHHH – you are certainly ‘speaking my language’…anything with cream cheese is tops with me…add a crunchy crust…make it single servings….and top it with my favorite fruit, raspberries. What’s not to love??? Printing and making soon. Thanks to both of you for sharing!!
Thank you!! 🙂 Enjoy!
Adorable! Like, literally cutest tartlets ever.
Thanks jamie!
Featured In
Rate This Recipe